While I love a stylish pair of zip front pants or jeans, my self-sewn pants usually sport an elastic waistband. It’s easy, quick and oh-so-comfy to wear……factors that are often important when I’m sewing!

For many years I’ve successfully sewn and taught waistband elastic and been pleased with the results. I’ll list my traditional steps below along with a “new” trick I learned that I can’t believe I didn’t know before. It all starts with a little square of fabric!
Using the width (3/4″ – 2″) of elastic your pattern calls for, shop for a cotton elastic at your local fabric shop. HINT: Do Not use the polyester elastic that comes pre-packaged as it will not hold up when sewn over. Cotton elastic is often on a large roll and sold by the yard, although you may find it packaged, too. It has great “memory” after it’s been sewn over, so it will snap back to the size you cut and keep your pants up. Kind of essential!
- To determine how much elastic to cut for your waistband, measure your waist and subtract 1 – 2″ from that measurement. Alternatively, wrap the elastic around your waist, and adjust the length until it is comfortable. That’s the length you want to cut and the method I usually use.
- If you haven’t seen your waist for a while and aren’t sure where to measure, bend to the side while standing. The part of your body that creases when you bend sideways is your waist – say hello!
- In the past, I would have now told you to overlap the ends of the elastic about 1/2″ and zigzag them together. That method still works, but it always leaves a bump where the ends are overlapped and it’s just not anywhere near as cool as the method I just learned. So, onto……..
The NEW Method
- Cut a small square or rectangle of fabric the width of your elastic by about 3 inches. If you’re using a lightweight fabric interface or double the square you cut.
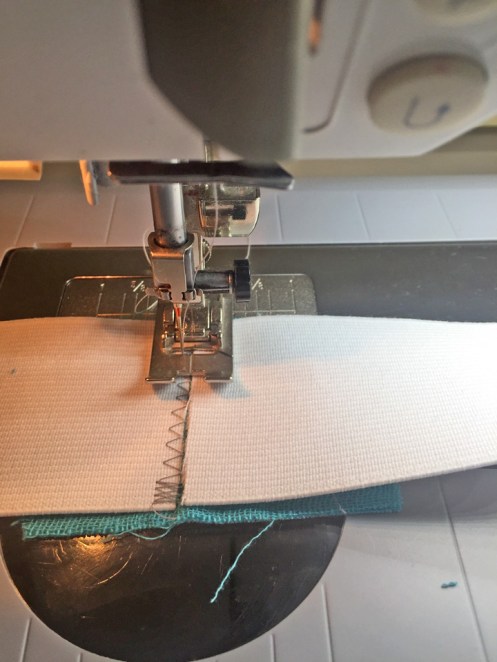
- Mark the center of the “wrong side” of your fabric square and line up one end of the elastic with your center marking. Using a fairly wide zigzag (4 – 5mm), zigzag the elastic end to the fabric square.
- Now line up the other end of the elastic so that the ends are kissed together with no space in between. Zigzag this end in the same way as the first. Make sure first that you haven’t added a twist to your “circle” of elastic. It’s not at all comfy that way!
- To finish this miraculous little joining, turn the elastic over so that the “right” side of your fabric square is facing up. Using pinking shears, trim each end of the fabric square close to your zigzagging. If you don’t have pinking shears, trim the ends with regular fabric scissors leaving enough that you can zigzag those edges to prevent ravelling.
- As you can see, your stitching and trimming does not have to be precise. It will all be encased in fabric when you’re done, so it won’t show!
I LOVE this method!!! I’ve always been frustrated with the little bump that is left when waistband elastic ends are overlapped. If you make swimwear, this would totally be the way to go, too.
My friend, Fonnell, tells me that this is not a NEW method and that she teaches her young sewing students to do it this way. Guess I should have been in her class! Instead, I learned this new-to-me method from the Indygo Junction Artisan Pants pattern, I will forever be grateful and now, so will you. And, if you’ve been doing this for years, you may now quietly chuckle or even LOL.
If you’re not familiar with stitching in waistband elastic without a casing, my next pants post will tell you all you need to know!


Hi Annette,
I never knew this! You are such a great teacher! I am SEW inspired! 🙂
Looking forward to seeing many more tutorials from you!
Thanks! El
Thank you!
That is clever
Thank you! I was pretty pleased to learn it. Even if my friend said it was “old news”. LOL